How To Replace A Faucet
Taps might be the last thing you think about breaking in your house but like everything, even taps have a natural life cycle. so why not learn how to fix and replace a faucet just in case yours breaks. There are three types of taps installed in homes:
• screw with gasket
• ball valve
• cartridge (single control)
If you have a screw with a gasket tap that breaks, then it cannot be repaired and must be replaced as it is no longer possible to stop the water flow. If you happen to have the second type of tap, the ball valve, if the control lever can no longer rotate or water always drips when it’s rotated then it will also need to be replaced. However, the single-control type tap will only need to be changed when, even if you change the ceramic cartridge, you can’t mix water or control its flow. When it comes to removing the taps to replace them with brand-new ones, it’s important to note they require different processes and disassembling procedures dependent on the type of dispenser and installation (e.g. in the kitchen sink, in the bathroom sink, on an external fountain). Let’s look at the three classic cases.
Step 1
Disassembling An External Tap
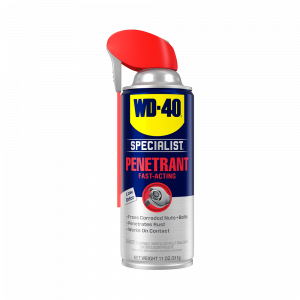
In general, faucets outside the house are usually the ball valve or screw type. Mixing should not happen as they only supply cold water. In most cases, these taps are screwed onto a threaded sleeve that is inserted into a structure (external wall, column, etc.) flush with the surface. The threaded connection is usually hidden by a circular mask that completes the tap and disassembly is simple with this type of tap. After shutting off the water supply to the main valve of the house, the body of the dispenser must be grasped fairly close to the threaded connection using a parrot wrench, then rotated counter clockwise. If it is difficult to turn, we suggest applying some WD-40 Specialist Fast Release Penetrant on the threading, which quickly penetrates and loosens the tap for easy removal. The formula is also water-resistant so it will work even if there is residual water. Once the tap has been unscrewed, we suggest cleaning the thread of the wall sleeve with a toothbrush or a pipe brush, and if you’re not immediately installing a new tap, it’s best to screw in a threaded cap.
Step 2
How To Remove & Replace A Wall Mounted Kitchen Faucet Or A Bathroom Unit Installed On The Wall
Wall-mounted kitchen or bathroom sink faucets are connected to two threaded sleeves (for hot and cold water) that protrude from the wall, using two hexagonal-nut threaded ferrules. First, remove the broken tap by gripping the ferrules with a fork wrench or adjustable wrench and turning counter clockwise. Once you’ve finished unscrewing, the tap can be removed. Also, in this case, you can use WD-40 Specialist Fast Release Penetrant on it if it is difficult to unscrew. The two S-shaped fittings used to adjust the distance of the connections (which are fixed because they are in the wall) to that of the tap connections remain screwed on the wall sleeves. These adapters can be left in place or removed to be replaced with new ones. In any case, they must be subsequently rotated to adapt to the distance of the connections of the new faucet.
Step 3
How To Replace A Kitchen Tap
If the tap to be replaced is installed in the kitchen sink, a different process must be followed. The bottom of the tap has a large threaded connection with two pipes (usually flexible) which connect the hot and cold water wall connections. The threaded body is inserted into the sink and locked, from below, with a large nut. In the first instance, start by disconnecting the two pipes from the hot and cold water supply on the walls under the sink. You’ll need to unscrew the two ferrules on the water supply (always remember to shut off the inflow of hot and cold water beforehand). At this point, you can unscrew the large nut that blocks the threaded connection of the tap. You’ll have to do this step under the sink; this may be uncomfortable based on the space and position of the nut. Once you’ve removed this part, you can remove the tap from above by releasing both its threaded base and the two pipes that were connected to the supply from the hole in the sink. If this proves difficult, you can apply WD-40 Specialist Fast-Acting Penetrant to loosen it.
Step 4
How To Disassemble & Remove A Broken Bathroom Tap
The tap used in a bathroom sink can be disassembled like the kitchen tap. The threaded part inserted into the sink is usually not tightened with a nut but has a metal plate (usually crescent-shaped) mounted with two screws and an interposed gasket. Also, in this case, it may be useful to loosen the screws with WD-40 Specialist Fast-Acting Penetrant before disassembling. The sink also has a plug lifting system consisting of some movable rods connected to each other with joints. These rods must be disconnected before the tap can be removed from the above.
Now you can enjoy your new faucet
Contact Us
© 2025 WD-40 Company.
All Rights Reserved
Regístrate para recibir ofertas exclusivas, consejos útiles e información de la Marca WD-40.


